I am so over hearing about or receiving products that say they are "all natural" and "healthy" only to scan the ingredients and see that Stevia is an ingredient.
I know that for many, Stevia is a great option. If you are diabetic and must have something sweet, I can see how it could be a life saver. I also understand that Stevia comes from a plant, stevia rebaudiana. But, sugar, real sugar, also comes from a plant, and it isn't the best, either.
Anything that is sweet, whether real or chemical, causes a change in the body. While a natural change is better than a chemical change, like from aspartame or sucralose, our body still perceives that it is getting sugar and prepares itself to handle that. This leaves your body in the same predicament that chemical sweeteners do, meaning that the body amps up it's production of cortisol, glycogen, adrenaline, etc, to help break down the sugar, only to have no sugar to break down.
So, stevia is not quite the miracle plant it is touted to be and, in my opinion, has no place in a clean diet.
Honey (go local!) and maple syrup are my two favorite ways to sweeten naturally. Agave is another option, but it is also a bit controversial for some of the same reasons as stevia. Also, in my opinion, I feel like if you "have" to have a sweet treat, live it up. Have real, raw sugar in a cookie or ice cream. Not everyday, but for a treat. Your body does know how to process this and, while it isn't ideal daily, your body can handle it every now and then. (Unless you have a medical condition that causes you not to be able to have sugar.)
For food and drinks that don't require sugar or sweetener, just let it go! Drinking black coffee, unsweetened tea and unsweetened milk (think coconut or almond) may not be great at first, but I switched all of those and now I can't stand sweet drinks.
I love to bake and will splurge and use real, raw sugar every now and then, especially if others will be eating it. Other than that I use local honey or applesauce.
Plus, you guys, I just tried a shake that was sweetened with stevia and it tastes gross. Fake sweet. Icky sweet. You don't want fake. You want real.

On the move! I am a Classical Pilates Instructor, mommy and wife. Sharing my thoughts and tips on fitness, food, family and feeling better!
Showing posts with label cooking. Show all posts
Showing posts with label cooking. Show all posts
Wednesday, May 21, 2014

Thursday, October 3, 2013
Kansas City Guacamole
Today's recipe came from boredom or perhaps lack of ingredients, but turned into a tasty recipe that satisfies my love of avocados and my KC BBQ heart.

2 avocados
1 tomato, diced
4-6 green onions, sliced thin
1-2 tbsp barbacue sauce (This KC girls used Gates...duh!)
Mash the avocado and add the other ingredients. Stir to just blend.
Serve with tortilla chips, fresh veggies, or use to top a veggie burger or sizzling Kansas City strip.
Enjoy!

2 avocados
1 tomato, diced
4-6 green onions, sliced thin
1-2 tbsp barbacue sauce (This KC girls used Gates...duh!)
Mash the avocado and add the other ingredients. Stir to just blend.
Serve with tortilla chips, fresh veggies, or use to top a veggie burger or sizzling Kansas City strip.
Enjoy!
Thursday, June 27, 2013
A Very Healthy Cookie
It is no secret that I love cookies. But I really need to get my sweet tooth under control. On the other side of that, I tend to get grumpy if I don't get a sweet treat.
Here is a clean eating, nut-free cookie that definitely satisfied my sweet tooth!
It is SO healthy that you can eat it for breakfast or as a snack after your workout.

Healthy Chocolate Chip Cookies
2 ripe bananas
1/3 cup sunflower seed butter
2/3 cup unsweetened apple sauce
1 tsp vanilla
1/2 tsp sea salt
1/2 tsp cinnamon
dash of nutmeg
1 1/2 cup old fashioned oats
1/2 cup dark chocolate chips (to go vegan use carob chips OR dried fruit!)
Directions:
Preheat oven to 350 degrees F. Line a baking sheet with parchment paper.
In a large bowl mash the bananas. Add the remaining ingredients through nutmeg and stir until blended. Add the oats and chocolate chips, stir til blended.
Spoon a rounded tablespoon of the cookie dough onto the lined cookie sheet.
Bake for 20 minutes or until golden.
Store in an airtight container, refrigerated for optimum freshness.
Enjoy!
Here is a clean eating, nut-free cookie that definitely satisfied my sweet tooth!
It is SO healthy that you can eat it for breakfast or as a snack after your workout.

Healthy Chocolate Chip Cookies
2 ripe bananas
1/3 cup sunflower seed butter
2/3 cup unsweetened apple sauce
1 tsp vanilla
1/2 tsp sea salt
1/2 tsp cinnamon
dash of nutmeg
1 1/2 cup old fashioned oats
1/2 cup dark chocolate chips (to go vegan use carob chips OR dried fruit!)
Directions:
Preheat oven to 350 degrees F. Line a baking sheet with parchment paper.
In a large bowl mash the bananas. Add the remaining ingredients through nutmeg and stir until blended. Add the oats and chocolate chips, stir til blended.
Spoon a rounded tablespoon of the cookie dough onto the lined cookie sheet.
Bake for 20 minutes or until golden.
Store in an airtight container, refrigerated for optimum freshness.
Enjoy!
Tuesday, June 4, 2013
Blueberry topped Banana Muffins
These muffins aren't health food, but they are home made and chemical free, so way better than anything from the store, right? You can use honey or agave in place of the brown sugar to make them even better on the healthiness scale.
Perfect for breakfast on a busy morning, a lazy Sunday or to help satisfy a sweet craving.
I will warn you, they are hard to resist!

Ingredients
4-5 ripe bananas
1 cup packed light brown sugar
1/2 cup coconut oil
1 large egg
1 cup unbleached flour
1 cup whole wheat flour
(I used 2 cups of Trader Joe's whole wheat blend)
1 teaspoon baking powder
1 teaspoon baking soda
1/2 teaspoon sea salt
1/2 cup applesauce
1 table spoon pure vanilla extract
Fresh or frozen blueberries, or your favorite berry.
Directions
1. Preheat oven to 350 degrees. Rub a small amount of coconut oil into each space in your muffin tin.
2. Peel the bananas and place them in bowl. Mash or beat with a mixed until smooth. Add brown sugar, oil and egg: beat until smooth.
Add flours, baking powder, baking soda and salt; beat until smooth. Add applesauce and vanilla; beat until smooth.
3. Fill muffin tins three-quarters full and top each with a few berries. Bake until a toothpick can be inserted and come out clean, about 25 minutes for regular sized muffins, 20 minutes for mini muffins. Remove from oven, allow to cool for 2 minutes, then transfer to a wire cooling wrack. Can be stored at room temperature or in the fridge.
Perfect for breakfast on a busy morning, a lazy Sunday or to help satisfy a sweet craving.
I will warn you, they are hard to resist!

Ingredients
4-5 ripe bananas
1 cup packed light brown sugar
1/2 cup coconut oil
1 large egg
1 cup unbleached flour
1 cup whole wheat flour
(I used 2 cups of Trader Joe's whole wheat blend)
1 teaspoon baking powder
1 teaspoon baking soda
1/2 teaspoon sea salt
1/2 cup applesauce
1 table spoon pure vanilla extract
Fresh or frozen blueberries, or your favorite berry.
Directions
1. Preheat oven to 350 degrees. Rub a small amount of coconut oil into each space in your muffin tin.
2. Peel the bananas and place them in bowl. Mash or beat with a mixed until smooth. Add brown sugar, oil and egg: beat until smooth.
Add flours, baking powder, baking soda and salt; beat until smooth. Add applesauce and vanilla; beat until smooth.
3. Fill muffin tins three-quarters full and top each with a few berries. Bake until a toothpick can be inserted and come out clean, about 25 minutes for regular sized muffins, 20 minutes for mini muffins. Remove from oven, allow to cool for 2 minutes, then transfer to a wire cooling wrack. Can be stored at room temperature or in the fridge.
Tuesday, May 28, 2013
Grilled Soup
When the weather is even remotely warm JF loves to fire up the grill and make a meal. Or two.
I love food from the grill and we almost always end up with leftovers.
One of my favorite things to make is soup containing our leftovers.
The ingredients that you use will vary based on what you have, but this will give you a basic recipe to follow.

1. Heat 1 tbsp olive oil in a skillet.
2. Add diced onion and garlic and saute until transluscent.
3. Add a few handfuls of spinach or kale (for health's sake) and stir until shrunk.

4. Add 2 cups of chicken broth to clean up the pan.
Now for the fun part.

Take whatever meat and veggies you have left and chop them up. Add them to the pot.
I have even been known to add leftover baked beans, a spoonful of relish, whatever we have left. Grilled squash, diced baked potato pieces...it's all fair game!
Cover and allow to simmer for at least 30 minutes, but the longer it goes the more the flavors will get to know each other :)
This would also be great to toss into a slow cooker in the morning. I don't know about you, but Monday morning after a great, outdoor fun Sunday, is hard. This way you will have dinner ready after your long Monday!
I want to know! If you use this recipe, let me know what ingredients from your grill that you used!
I love food from the grill and we almost always end up with leftovers.
One of my favorite things to make is soup containing our leftovers.
The ingredients that you use will vary based on what you have, but this will give you a basic recipe to follow.

1. Heat 1 tbsp olive oil in a skillet.
2. Add diced onion and garlic and saute until transluscent.
3. Add a few handfuls of spinach or kale (for health's sake) and stir until shrunk.

4. Add 2 cups of chicken broth to clean up the pan.
Now for the fun part.

Take whatever meat and veggies you have left and chop them up. Add them to the pot.
I have even been known to add leftover baked beans, a spoonful of relish, whatever we have left. Grilled squash, diced baked potato pieces...it's all fair game!
Cover and allow to simmer for at least 30 minutes, but the longer it goes the more the flavors will get to know each other :)
This would also be great to toss into a slow cooker in the morning. I don't know about you, but Monday morning after a great, outdoor fun Sunday, is hard. This way you will have dinner ready after your long Monday!
 |
| I added roasted brussels sprouts to this batch. So good. |
I want to know! If you use this recipe, let me know what ingredients from your grill that you used!
Saturday, April 27, 2013
Strawberry Almond Kale Smoothie
I can't believe it is already Day 6 of The Green Smoothie Challenge! It has been so fun to share my recipes with you and to read all of the awesome recipes that everyone else is posting.
Today I am sharing another hearty smoothie that would be good for breakfast or a lunch on the go.
3 big servings of veggies and fruit. almond milk for protien and sunflower seed butter adds a rich taste along with protein and the many health benefits of sunflower seeds.
Todays smoothie:

Strawberry Almond Kale Smoothie
6 Strawberries, greens removed
6 peach slices, fresh or frozen
1 bunch/handful fresh kale
1 tbsp sunflower seed butter
1 cup almond milk
Honey, agave or maple syrup to taste
Combine all ingredients in a blender and blend until smooth.
Drink immediately!
I hope you have an excellent Saturday!
My Honey Stinger giveaway ends tonight at midnight so go enter NOW!
Speaking of Giveaways, Katherine has an awesome giveaway for ENERGYbits. You know, the superfood bits I have raved about in the past!
Enter here:
a Rafflecopter giveaway
And stay tuned for more GREAT ENERGYbits news from me in the next few weeks!
Today I am sharing another hearty smoothie that would be good for breakfast or a lunch on the go.
3 big servings of veggies and fruit. almond milk for protien and sunflower seed butter adds a rich taste along with protein and the many health benefits of sunflower seeds.
Todays smoothie:

Strawberry Almond Kale Smoothie
6 Strawberries, greens removed
6 peach slices, fresh or frozen
1 bunch/handful fresh kale
1 tbsp sunflower seed butter
1 cup almond milk
Honey, agave or maple syrup to taste
Combine all ingredients in a blender and blend until smooth.
Drink immediately!
I hope you have an excellent Saturday!
My Honey Stinger giveaway ends tonight at midnight so go enter NOW!
Speaking of Giveaways, Katherine has an awesome giveaway for ENERGYbits. You know, the superfood bits I have raved about in the past!
Enter here:
a Rafflecopter giveaway
And stay tuned for more GREAT ENERGYbits news from me in the next few weeks!
Thursday, April 25, 2013
Drink your oatmeal!
It's Friday and Day 5 of the Green Smoothie Challenge! Are you loving it so far?
From mom telling you that oatmeal is a good breakfast because it "sticks to your ribs" to the many studies that, thanks to soluable fiber, oatmeal can help lower cholesterol, there are many reasons to start the day with a bowl of oatmeal. But maybe you are low on time or oatmeal just isn't your thing.
The smoothie I am sharing today not only has greens but oatmeal, too!
My recipe for Overnight Steel Cut Oatmeal goes great in this smoothie :)

Oatmeal Smoothie
1/2 cup Overnight Oats
8 strawberries
1/2 cup almond milk, or milk of your choice
1-2 handfuls spinach
1 tbsp sunflower seed butter or nut butter
Blend all of the ingredients until smooth, adding more milk to thin to your desired consistency.
For best results use frozen strawberries.
I really liked the flavor of this one and, thanks to the oats and sun butter I was not hungry until lunch.
Got a smoothie recipe you want to share? Join today's link-up!
There is still time to enter to win Honey Stinger Lemon Waffles and Organic Energy Gels...head here to enter!
Make sure to stop by my co-hosts blogs for even more green smoothie fun:
From mom telling you that oatmeal is a good breakfast because it "sticks to your ribs" to the many studies that, thanks to soluable fiber, oatmeal can help lower cholesterol, there are many reasons to start the day with a bowl of oatmeal. But maybe you are low on time or oatmeal just isn't your thing.
The smoothie I am sharing today not only has greens but oatmeal, too!
My recipe for Overnight Steel Cut Oatmeal goes great in this smoothie :)

Oatmeal Smoothie
1/2 cup Overnight Oats
8 strawberries
1/2 cup almond milk, or milk of your choice
1-2 handfuls spinach
1 tbsp sunflower seed butter or nut butter
Blend all of the ingredients until smooth, adding more milk to thin to your desired consistency.
For best results use frozen strawberries.
I really liked the flavor of this one and, thanks to the oats and sun butter I was not hungry until lunch.
Got a smoothie recipe you want to share? Join today's link-up!
There is still time to enter to win Honey Stinger Lemon Waffles and Organic Energy Gels...head here to enter!
Make sure to stop by my co-hosts blogs for even more green smoothie fun:
A Purple Green Smoothie!
Hey ho! It's day 4 of the Green Smoothie Challenge!
How is it going for you?
For me, I am feeling better, enjoying the new flavors I am getting to try, and I don't know if you are noticing this, but my skin feels and looks better! All those vitamins, minerals and free-radical fighting compounds, huh?
Today I would like to share a green smoothie that is actual a lovely shade of purple. It also feels a lot more like a dessert than a health drink. Alway a plus!

Purple Dessert Smoothie
1 banana, peeled
1/2 cup frozen blueberries
1 tbsp peanut butter, or the nut butter of your choice
4 oz (1/2 cup) chocolate milk of your choice
1 handful baby kales
Blend until smooth. And it will be smooth, creamy and delicious! Perfect if you tend to have a sweet tooth mid-day or in the evening.
If you haven't tried one yet, make this be the green smoothie you try!
As part of this awesome challenge Katherine has TWO giveaways going on!
Ormus Greens
a Rafflecopter giveaway
And don't forget to check out MY giveaway hosted by Honey Stinger. Awesome organic workout fuel products!
As always, don't forget to check in with my co-hosts Jezz // Kristine // Ashlee // Hope for even more recipes and fun ideas on how to stay healthy!
How is it going for you?
For me, I am feeling better, enjoying the new flavors I am getting to try, and I don't know if you are noticing this, but my skin feels and looks better! All those vitamins, minerals and free-radical fighting compounds, huh?
Today I would like to share a green smoothie that is actual a lovely shade of purple. It also feels a lot more like a dessert than a health drink. Alway a plus!

Purple Dessert Smoothie
1 banana, peeled
1/2 cup frozen blueberries
1 tbsp peanut butter, or the nut butter of your choice
4 oz (1/2 cup) chocolate milk of your choice
1 handful baby kales
Blend until smooth. And it will be smooth, creamy and delicious! Perfect if you tend to have a sweet tooth mid-day or in the evening.
If you haven't tried one yet, make this be the green smoothie you try!
As part of this awesome challenge Katherine has TWO giveaways going on!
Ormus Greens
- Grown and produced in America
- Certified 100% organic AND non-GMO
- Completely raw (cold drying process)
- Eco-friendly
Sun Warrior Liquid Light
- Helps balance pH in the body
- Replaces electrolytes
- Goes great in smoothies, juice or just water
a Rafflecopter giveaway
And don't forget to check out MY giveaway hosted by Honey Stinger. Awesome organic workout fuel products!
As always, don't forget to check in with my co-hosts Jezz // Kristine // Ashlee // Hope for even more recipes and fun ideas on how to stay healthy!
Monday, April 8, 2013
Green Smoothie Challenge!
Happy Monday!
You may remember me linking up with Katherine from The Real Food Runner blog in the past. She did a Workout Wednesday post for me and I have taken part in her Green Smoothie Challenge as well as the always fantastic Fresh Friday link-up!

She is hosting another Green Smoothie Challenge, this time bigger and better than ever, and has asked me to join her as a co-host!
My Instagram friends know that I have a Super Drink Week coming up in May, so this is the perfect prelude to that!
So, what is the Green Smoothie Challenge? This 30 second video sums it up:
Easy, huh? For the week of April 22-28 just add one green smoothie to your regular diet. Nothing wacky or restrictive, just ADDING a nutrient-filled smoothie to your day so that you get more power in your diet, feel better and look better!
And the best part? You won't be alone! Link-up here for recipes, advice, support and more! You will also find more details on the challenge from Katherine herself! Make sure to tell her I sent you ;)
You will sign up for the challenge on Katherine's blog, but don't forget to let me know in the comment section below! I wanna know who is in for the challenge!
What's that? You aren't yet following me on bloglovin'??? Well, click here so that you never miss a post!
You may remember me linking up with Katherine from The Real Food Runner blog in the past. She did a Workout Wednesday post for me and I have taken part in her Green Smoothie Challenge as well as the always fantastic Fresh Friday link-up!

She is hosting another Green Smoothie Challenge, this time bigger and better than ever, and has asked me to join her as a co-host!
 |
| What a great looking group I get to be a part of! |
So, what is the Green Smoothie Challenge? This 30 second video sums it up:
Easy, huh? For the week of April 22-28 just add one green smoothie to your regular diet. Nothing wacky or restrictive, just ADDING a nutrient-filled smoothie to your day so that you get more power in your diet, feel better and look better!
And the best part? You won't be alone! Link-up here for recipes, advice, support and more! You will also find more details on the challenge from Katherine herself! Make sure to tell her I sent you ;)
You will sign up for the challenge on Katherine's blog, but don't forget to let me know in the comment section below! I wanna know who is in for the challenge!
What's that? You aren't yet following me on bloglovin'??? Well, click here so that you never miss a post!
Thursday, March 28, 2013
Quinoa Tuna Casserole

I LOVE homemade tuna and noodles. It is a comforting, flavorful dish that is also great re-heated. But for the last year or so we have been slowly inching our way away from pasta.
What used to be a once or twice a week meal has now become an almost never meal choice for my family as a whole. The boys love a good box of Annie's Mac n Cheese, but JF and I rarely make or eat pasta ourselves.
But then the snow started falling. And I was reminded of a few years ago when I had made a giant recipe of tuna and noodles during a blizzard. So what is a girl to do?
Use Quinoa!

This recipe is a quicker take on true tuna and noodles. I do plan on trying it again making my own bechamel sauce rather than the condensed soup. Although the organic cream of ____ soups have truly been a prayer answered for my cooking needs!

1 box (12 ounces) organic condensed cream of mushroom soup
1/3 cup greek yogurt OR mayonnaise OR Veganaise
2 tablespoons milk of your choice
1 1/4 cup shredded cheese (I used a cheddar/jack blend)
black pepper to taste
2 cans water packed Albacore tuna, drained
Cooked quinoa: cook 1 cup dried quinoa based on package directions
2 cups cooked broccoli1/4 cup freshly grated parmesan
Preheat oven to 350*
Coat a square 8x8 baking dish with oil of your choosing (butter, coconut oil, olive oil, etc.)
In a large bowl combine the soup, greek yogurt, milk, 1 cup shredded cheese and pepper until well blended.
Fold in the quinoa, tuna and broccoli.
Spoon the mixture into the baking dish
Sprinkle with the remaining 1/4 cup shredded cheese and parmesan.
Bake for 30-40 minutes or until bubbly on the edges and golden on top.

Thursday, March 21, 2013
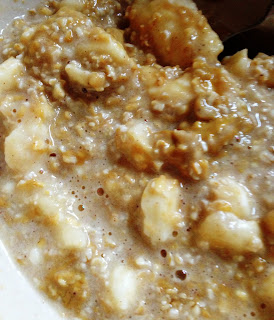
Overnight Steel Cut Oats
Why is it that some of the healthiest, yummiest food looks...well...not so pretty?
Today, my recipe is one of those.

I just LOVE overnight recipes. It feels like Christmas Eve or like waiting for the Tooth Fairy! Mix a few ingredients together and wake up to magic! Or breakfast.

1 cup unsweetened almond milk (or your milk of choice)
1/2 cup steel cut oats
Optional add ins:
1-2 tsp sweetener of your choice (I used honey, but maple syrup, agave, raw sugar--all would work great)
A few shakes of cinnamon
Place ingredients in a bowl, stir, cover, and refrigerate overnight, but will taste even better 48 hours later!
For my bowl I added a mashed banana and about 1 tbsp of sunflower seed butter. Microwaved for 30 seconds and *bam* a super tasty and comforting breakfast.
What add-ins are you going to use?
Does this count as a "raw" recipe?
And, now, I would like to interrupt this blog post for a moment of cuteness and real talk:

Today, my recipe is one of those.

I just LOVE overnight recipes. It feels like Christmas Eve or like waiting for the Tooth Fairy! Mix a few ingredients together and wake up to magic! Or breakfast.

1 cup unsweetened almond milk (or your milk of choice)
1/2 cup steel cut oats
Optional add ins:
1-2 tsp sweetener of your choice (I used honey, but maple syrup, agave, raw sugar--all would work great)
A few shakes of cinnamon
Place ingredients in a bowl, stir, cover, and refrigerate overnight, but will taste even better 48 hours later!
For my bowl I added a mashed banana and about 1 tbsp of sunflower seed butter. Microwaved for 30 seconds and *bam* a super tasty and comforting breakfast.

What add-ins are you going to use?
Does this count as a "raw" recipe?
And, now, I would like to interrupt this blog post for a moment of cuteness and real talk:

Have you seen this? Eeeep! Or, rather, Peeeep! It is so cute but also so very true! Maybe I am just having a girly/mom moment, but seeing this on GMA this morning made me want to tear up. And re-post on Instagram. And now blog about it.
We really are all the same on the inside.
Pink, green, turquoise, mint...we are still marshmallow fluff on the inside!
Thursday, March 14, 2013
Coconut Brownie Dip
Follow my blog with Bloglovin

It is no secret that I am a big fan of sweets. It is really difficult for me to go an entire day without some kind of treat. But I know how bad sugar is for the body and I am always in planning mode to give up refined sugar. Sigh.
While scanning blogs and Pinterest I have noticed all sorts of recipes for various "healthy" desserts. Of course I click on those links and I am usually disappointed to find that the recipes use fake sweeteners, aka poison, or some other sort of chemical-laden ingredient, like pudding mix or Cool Whip. It has taken me a little time to brainstorm and test recipes but I have come up with what I feel are some really great healthy alternatives to traditional desserts!
Before we get started, let me just say that I know this recipe has coconut in it and that people either love or hate coconut. If you are the type that hates coconut, PLEASE keep reading and know that the coconut can easily be omitted without compromising taste :)
And now...drumroll please...
Coconut Brownie Dip
1 can of black beans, rinsed and drained
1/4 cup nut or seed butter (I used sunflower butter bc of L's allergy)
2 tbsp unsweetened cocoa powder
1 tbsp oats
1/8 tsp salt
1/8 tsp baking soda
2 tsp pure vanilla extract
4-6 tbsp sweetener of your choice (I used maple syrup, but you could used agave or honey, too)
1/3 cup dehydrated coconut
1/2 cup semi-sweet chocolate chips
In a food processor first place the oats and pulse a few seconds.
Add the all other ingredients except the coconut and chocolate chips. Blend until smooth and scoop into a bowl. Fold in the coconut and chocolate chips.
For extra fun, top with a little extra coconut or chips.
This dip is great at room temperature or chilled. You will want to store it in the fridge.
It's great with fresh strawberries, bananas and apples. L and I also snacked on graham crackers topped with Brownie Dip. Or you can always just eat it straight from the bowl!
As I said, L loved it, so it's preschooler approved. My mother-in-law volunteered (sort of) to do a taste test. She knew it was brownie dip but didn't know it was made with beans. She gave it 2 thumbs up!

Enjoy this recipe and please let me know if you try it!

It is no secret that I am a big fan of sweets. It is really difficult for me to go an entire day without some kind of treat. But I know how bad sugar is for the body and I am always in planning mode to give up refined sugar. Sigh.
While scanning blogs and Pinterest I have noticed all sorts of recipes for various "healthy" desserts. Of course I click on those links and I am usually disappointed to find that the recipes use fake sweeteners, aka poison, or some other sort of chemical-laden ingredient, like pudding mix or Cool Whip. It has taken me a little time to brainstorm and test recipes but I have come up with what I feel are some really great healthy alternatives to traditional desserts!
Before we get started, let me just say that I know this recipe has coconut in it and that people either love or hate coconut. If you are the type that hates coconut, PLEASE keep reading and know that the coconut can easily be omitted without compromising taste :)
And now...drumroll please...
Coconut Brownie Dip
1 can of black beans, rinsed and drained
1/4 cup nut or seed butter (I used sunflower butter bc of L's allergy)
2 tbsp unsweetened cocoa powder
1 tbsp oats
1/8 tsp salt
1/8 tsp baking soda
2 tsp pure vanilla extract
4-6 tbsp sweetener of your choice (I used maple syrup, but you could used agave or honey, too)
1/3 cup dehydrated coconut
1/2 cup semi-sweet chocolate chips
In a food processor first place the oats and pulse a few seconds.
Add the all other ingredients except the coconut and chocolate chips. Blend until smooth and scoop into a bowl. Fold in the coconut and chocolate chips.
For extra fun, top with a little extra coconut or chips.
This dip is great at room temperature or chilled. You will want to store it in the fridge.
It's great with fresh strawberries, bananas and apples. L and I also snacked on graham crackers topped with Brownie Dip. Or you can always just eat it straight from the bowl!
As I said, L loved it, so it's preschooler approved. My mother-in-law volunteered (sort of) to do a taste test. She knew it was brownie dip but didn't know it was made with beans. She gave it 2 thumbs up!

Enjoy this recipe and please let me know if you try it!
Tuesday, December 18, 2012
Vegetarian Mexican Pizza

Back in my carefree days when I ate Taco Bell without worrying about what I was actually putting into my body, one of my favorites was their Mexican Pizza. Even back then I would leave the meat off, but it still isn't the healthiest of options. A few weeks ago I was craving the crunchy goodness of a Mexican pizza, and came up with this recipe.
Vegetarian Mexican Pizza
8 Flour Tortillas
1 tbsp olive oil
1/2 cup chopped onion
2 tsp fresh minced garlic
2-3 bunches of fresh spinach or kale, finely chopped1 can black beans, drained and rinsed
1 package of Tasty Bite Madras Lentils, or any brand of lentil/bean chili
Shredded cheddar cheese
Your favorite salsa

Pre-heat oven to 325*
Prick each tortilla 2-3 times with a fork (to prevent giant air pillows while baking.) Place flour tortillas directly on the oven racks. Check ever 5 minutes and turn and rotate positions as needed using a pair of tongs. You will know they are ready when the tortillas are crispy and just starting to brown.
Meanwhile...
Heat olive oil over medium heat. Add the onion and garlic and saute until translucent. Add the spinach, stirring frequently, and saute until shrunk. Add the black beans and lentils. Stir until well-mixed, cover, and reduce heat to simmer. Simmer for at least 10 minutes but up to 30 minutes. Allow mixture to cool to warm.
Place a single layer of tortillas on a cookie sheet. Top each tortilla with the bean mixture and then sprinkle with cheese. Top with another tortilla, spread a thin layer of salsa and sprinkle with cheese. Bake for 10-15 minutes or until cheese is melted and bubbling.
 |
| I snuck a few banana peppers on top of mine! |
 |
| Happy! |
 |
| Zombie eyes, but he ate it and loved it! |
Kid Approved!
Sunday, December 16, 2012
Introducing...Veronica!
Hey friends!
Some of you have already met my best friend Veronica when she did a guest spot last summer about the 5 Day Slim Down diet I created for her literally 5 days before her wedding.
Starting tomorrow, and after that each month, Veronica is going to be sharing her weight loss journey on my blog. The posts are tentatively title "The Road to Weight Loss with Ronnie" so keep an eye out!
I am so excited to be able to share her experiences on my blog. As we all know, it's tough to lose weight and change eating habits, and I think shared experiences can be very motivating and helpful.
I have been friends with Veronica for 15 years (yep, you are correct, we were 10 when we met, haha) and I think she is gorgeous in any size, but I completely understand her desire to shed a few pounds, become more comfortable in her body, and skinnify her wardrobe.
 |
| I think this was my 29th birthday. V bought me a Redbull and Vodka shot. It's the only one I have ever had. It was like a panic attack in a cup. But I still love you, V-Dog! |
 |
| I will never be able to post enough pictures of her wedding day! |
 |
| September of this year, I think Ezra took this :) |
I would love to see you leave comments on her posts with tips, tricks, and any other motivating comments you have.
If you happen to be in the same spot, wanting to eat better, add more physical activity to your day, and lose some weight, this would be a great time to start! You will have an accountability buddy right here on my blog!
So, please make sure to start following this blog so you don't miss a post!
I want to know:
Will you be following Veronica's posts?
Do you have any weight you want to lose?
Could your diet be a little healthier?
Friday, December 14, 2012
Celery, Cheese and Walnuts

My absolute favorite go-to snack is celery with babybel cheese. When I am feeling really wild I will add walnuts. Just ask my friends from work. I have been taking this as my lunch or dinner for over 2 years now. I credit my love for this food as being a major part in my weight loss from a couple of years ago. Many times I would be tempted to stop at a drive-thru, but didn't, knowing that my tasty celery and cheese was waiting for me.
I was beyond excited to see the Men's Health Magazine featured Edam cheese, brand name of Babybel, as one of 16 New Muscle Foods!
So, today, here is this magical snack!
1 Babybel cheese, left at room temperature just a few minutes to soften
2-3 celery stalks
6-8 walnut halves
Break the cheese apart into marble-sized pieces and spread on the celery. Top with walnuts for added protein.
Enjoy the obsession!
Monday, December 3, 2012
Shepherd's Pie, the healthy way
Shepherd's Pie really wasn't on my radar until just a few years ago when I found a recipe in Everyday Food. I tried it and found it was fun to make and really tasty. I think it also makes a great meal to take to a friend or family member. But I can never just let a recipe be a recipe. One of my most favorite things to do is to take a classic or favorite recipe and make it healthier. A few weeks ago I was planning my meals for the week and had sweet potatoes and ground turkey on hand and *zing* a healthier version of Shepherd's Pie was created. As usual, I have tried to sneak in as many veggies as possible. Hope you enjoy!
Sweet Potato Shepherd's Pie
1.5-2 lbs lean ground turkey
1 tsp mince fresh garlic OR 1/2 tsp garlic powder
1 tsp freshly ground black pepper
1 tbsp dried Italian herbs (basil, oregano)
1 can tomato paste
1/2 cup diced onion
1 cup chopped carrots
2 bunches fresh spinach or kale, chopped
2-3 fresh sweet potatoes
3/4 cup coconut milk or whichever milk you prefer
1 cup shredded cheddar cheese (optional)
For the sweet potatoes:
Steam or boil the sweet potatoes in a large pot of water. This takes about 10-15 minutes. Allow them to cool for 5 minutes in a collander. Place the cooked sweet potatoes in a bowl and add 3/4 cup milk. Using a mixer or potato masher, blend until smooth. Using a rubber spatula add 1/2 cup of shredded cheese. Now you have your topping! *You can do this the day before and refrigerate up to 24 hours*
For the turkey mixture:
In a skillet, brown the turkey. While cooking season with freshly ground black pepper, and Italian herbs. When completely browned, remove from pan and place on a plate lined with a few paper towels. Return the skillet to the stove top. Add a drizzle of olive oil and heat up (about 30-60 seconds). Add onions and garlic, stirring frequently until translucent. Add chopped carrots and saute another 5 minutes. Add the chopped kale or spinach, stirring frequently until the greens have shrunk. Add the can of tomato paste + 1/4 can of water. Stir until blended and then add the cooked turkey. Stir again and simmer on low for 5 minutes.
Spoon the turkey mixture into a 13x9 baking dish and evenly spread it across the dish. Spoon the sweet potatoes on top of the turkey mixture and spread evenly. If you want to get fancy you can put the potatoes in a cake-icing bag and pipe them on top...but only if you want to :)
Sprinkle with the remaining 1/2 cup of cheese.
Bake in a 350* oven for 30 minutes or until it's bubbling and the cheese is melted and starting to brown.
Thanks to all of the added veggies this can be the meal. I also like to serve with steamed broccoli or a fresh green salad.
This quickly became a family favorite at my house!

 |
| My boys love cheese. To make the recipe less fattening, skip the cheese :) |
Sweet Potato Shepherd's Pie
1.5-2 lbs lean ground turkey
1 tsp mince fresh garlic OR 1/2 tsp garlic powder
1 tsp freshly ground black pepper
1 tbsp dried Italian herbs (basil, oregano)
1 can tomato paste
1/2 cup diced onion
1 cup chopped carrots
2 bunches fresh spinach or kale, chopped
2-3 fresh sweet potatoes
3/4 cup coconut milk or whichever milk you prefer
1 cup shredded cheddar cheese (optional)
For the sweet potatoes:
Steam or boil the sweet potatoes in a large pot of water. This takes about 10-15 minutes. Allow them to cool for 5 minutes in a collander. Place the cooked sweet potatoes in a bowl and add 3/4 cup milk. Using a mixer or potato masher, blend until smooth. Using a rubber spatula add 1/2 cup of shredded cheese. Now you have your topping! *You can do this the day before and refrigerate up to 24 hours*
For the turkey mixture:
In a skillet, brown the turkey. While cooking season with freshly ground black pepper, and Italian herbs. When completely browned, remove from pan and place on a plate lined with a few paper towels. Return the skillet to the stove top. Add a drizzle of olive oil and heat up (about 30-60 seconds). Add onions and garlic, stirring frequently until translucent. Add chopped carrots and saute another 5 minutes. Add the chopped kale or spinach, stirring frequently until the greens have shrunk. Add the can of tomato paste + 1/4 can of water. Stir until blended and then add the cooked turkey. Stir again and simmer on low for 5 minutes.
Spoon the turkey mixture into a 13x9 baking dish and evenly spread it across the dish. Spoon the sweet potatoes on top of the turkey mixture and spread evenly. If you want to get fancy you can put the potatoes in a cake-icing bag and pipe them on top...but only if you want to :)
Sprinkle with the remaining 1/2 cup of cheese.
Bake in a 350* oven for 30 minutes or until it's bubbling and the cheese is melted and starting to brown.
Thanks to all of the added veggies this can be the meal. I also like to serve with steamed broccoli or a fresh green salad.
This quickly became a family favorite at my house!

Monday, November 26, 2012
Turkey!
I roasted my first turkey yesterday! I love cooking and baking, but for some reason I have never roasted a bird. Not even a chicken. It is surprising because I am a big Martha Stewart fan and one of her favorite go-to recipes, in her books and magazines, is a roast chicken. I would always look at it, feel overwhelmed, and turn the page.
But this year my mom didn't feel up to making the entire Thanksgiving meal, which is fine, because JF and I both enjoy cooking and have talked about taking over the duty for years now. So I went to my beloved Everyday Food Magazine and in this years Thanksgiving issue the Citrus-rubbed Turkey with Cider Gravy sounded really good and the recipe was easy to follow.
The turkey itself wasn't too bad. The neck was creepy yet interesting. The boys were very interested in helping so we showed them where the head had been, the spine, the rib cage and all that anatomically fascinating stuff. JF found the bag of goodies in the neck cavity and then I gave the bird a good rub down with a citrus-spice mix.
Sunday morning I set my alarm so that I could take it out of the fridge, let it sit, and then get it in the oven. The one way I deviated from Martha is that I used a roasting bag. Several of my students said it's the only way to go and it was pretty easy from a cooking and clean-up perspective.
And that's it. No cooking horror stories. Everyone enjoyed the meal! I definitely feel brave enough to try a roast chicken now, which is great because my boys love it!
In addition to the other side dishes I made a sweet potato casserole that used coconut milk instead of any other dairy products. Really good!
I failed as a blogger and Instagrammer and didn't really get any good pictures of the bird or the meal!
But this year my mom didn't feel up to making the entire Thanksgiving meal, which is fine, because JF and I both enjoy cooking and have talked about taking over the duty for years now. So I went to my beloved Everyday Food Magazine and in this years Thanksgiving issue the Citrus-rubbed Turkey with Cider Gravy sounded really good and the recipe was easy to follow.
The turkey itself wasn't too bad. The neck was creepy yet interesting. The boys were very interested in helping so we showed them where the head had been, the spine, the rib cage and all that anatomically fascinating stuff. JF found the bag of goodies in the neck cavity and then I gave the bird a good rub down with a citrus-spice mix.
Sunday morning I set my alarm so that I could take it out of the fridge, let it sit, and then get it in the oven. The one way I deviated from Martha is that I used a roasting bag. Several of my students said it's the only way to go and it was pretty easy from a cooking and clean-up perspective.
And that's it. No cooking horror stories. Everyone enjoyed the meal! I definitely feel brave enough to try a roast chicken now, which is great because my boys love it!
In addition to the other side dishes I made a sweet potato casserole that used coconut milk instead of any other dairy products. Really good!
I failed as a blogger and Instagrammer and didn't really get any good pictures of the bird or the meal!
 |
| Beautiful! |
 |
| After the meal and halfway through clean-up. |
Tuesday, November 20, 2012
Brussels Sprouts and Brownies
Brussels Sprouts and brownies. Seems like a weird combination, and it is, but it is a perfect example of how we should live. Something healthy, something fun. Crunchy greens, chewy chocolate. Finding a perfect balance is what it's all about.
I make roasted brussels sprouts at least twice a week. They are SO good, even if you think you don't like them, try this recipe, you may just change your mind.
Roasted Brussels Sprouts
10-20 Brussels Sprouts
1-2 tbsp Olive Oil
Sea Salt
Black Pepper
Garlic Powder
Basil (chopped fresh or dried)
Pre-heat oven to 400*
Cut the stump off the end of each sprout and cut each one in half. *
Place in a bowl along with the olive oil. Using a large spoon stir until the sprouts are evenly coated. Spread the sprouts onto a roasting pan or cookie sheet. Sprinkle with salt, pepper, garlic powder and basil. Then make sure each sprout is CUT SIDE down on the pan.
Roast for 10 minutes. Give the pan a nice shake-a shake and put back in the oven for another 5-10 minutes. You will know the sprouts are done when they start to brown just slightly. Any of the single leaves that are on the pan will be a wonderful, crispy-crunchy treat!
*I do not wash my brussels sprouts. I guess I am hoping the high temp of the oven will kill any bad stuff off, plus your sprouts need to be dry in order for them to roast well. So...if you do choose to wash them, allow plenty of time for them to dry.
Candy-topped Brownie Bites
Okay...this one is super easy and fun. Use a regular box of brownie mix but use applesauce in place of oil. Follow the baking/pre-heating directions on the box. Place the batter in lined mini-muffin tins and bake for 15-20 minutes. Use the clean toothpick trick to make sure they are done.
Remove the brownies from the oven and immediately top each one with a candy pumpkin or candy corn.
The great thing about making them in mini muffin tins is that your brownie is perfectly portioned to keep from going over board.
Enjoy! Let me know if you try these recipes :)
I make roasted brussels sprouts at least twice a week. They are SO good, even if you think you don't like them, try this recipe, you may just change your mind.
Roasted Brussels Sprouts
10-20 Brussels Sprouts
1-2 tbsp Olive Oil
Sea Salt
Black Pepper
Garlic Powder
Basil (chopped fresh or dried)
Pre-heat oven to 400*
Cut the stump off the end of each sprout and cut each one in half. *
Place in a bowl along with the olive oil. Using a large spoon stir until the sprouts are evenly coated. Spread the sprouts onto a roasting pan or cookie sheet. Sprinkle with salt, pepper, garlic powder and basil. Then make sure each sprout is CUT SIDE down on the pan.
Roast for 10 minutes. Give the pan a nice shake-a shake and put back in the oven for another 5-10 minutes. You will know the sprouts are done when they start to brown just slightly. Any of the single leaves that are on the pan will be a wonderful, crispy-crunchy treat!
*I do not wash my brussels sprouts. I guess I am hoping the high temp of the oven will kill any bad stuff off, plus your sprouts need to be dry in order for them to roast well. So...if you do choose to wash them, allow plenty of time for them to dry.
 |
| Cut off the purplish-brown stump. |
 |
| Toss to coat in olive oil. |
 |
| Make sure they are face down after sprinkling with herbs. |
Candy-topped Brownie Bites
Okay...this one is super easy and fun. Use a regular box of brownie mix but use applesauce in place of oil. Follow the baking/pre-heating directions on the box. Place the batter in lined mini-muffin tins and bake for 15-20 minutes. Use the clean toothpick trick to make sure they are done.
Remove the brownies from the oven and immediately top each one with a candy pumpkin or candy corn.
The great thing about making them in mini muffin tins is that your brownie is perfectly portioned to keep from going over board.
 |
| Cute and tasty! |
Enjoy! Let me know if you try these recipes :)
Subscribe to:
Posts (Atom)